
How to Create a Work Order
Learn how to create a Work Order using the MoreApp Platform following these steps.
1. Go to the Forms Tab
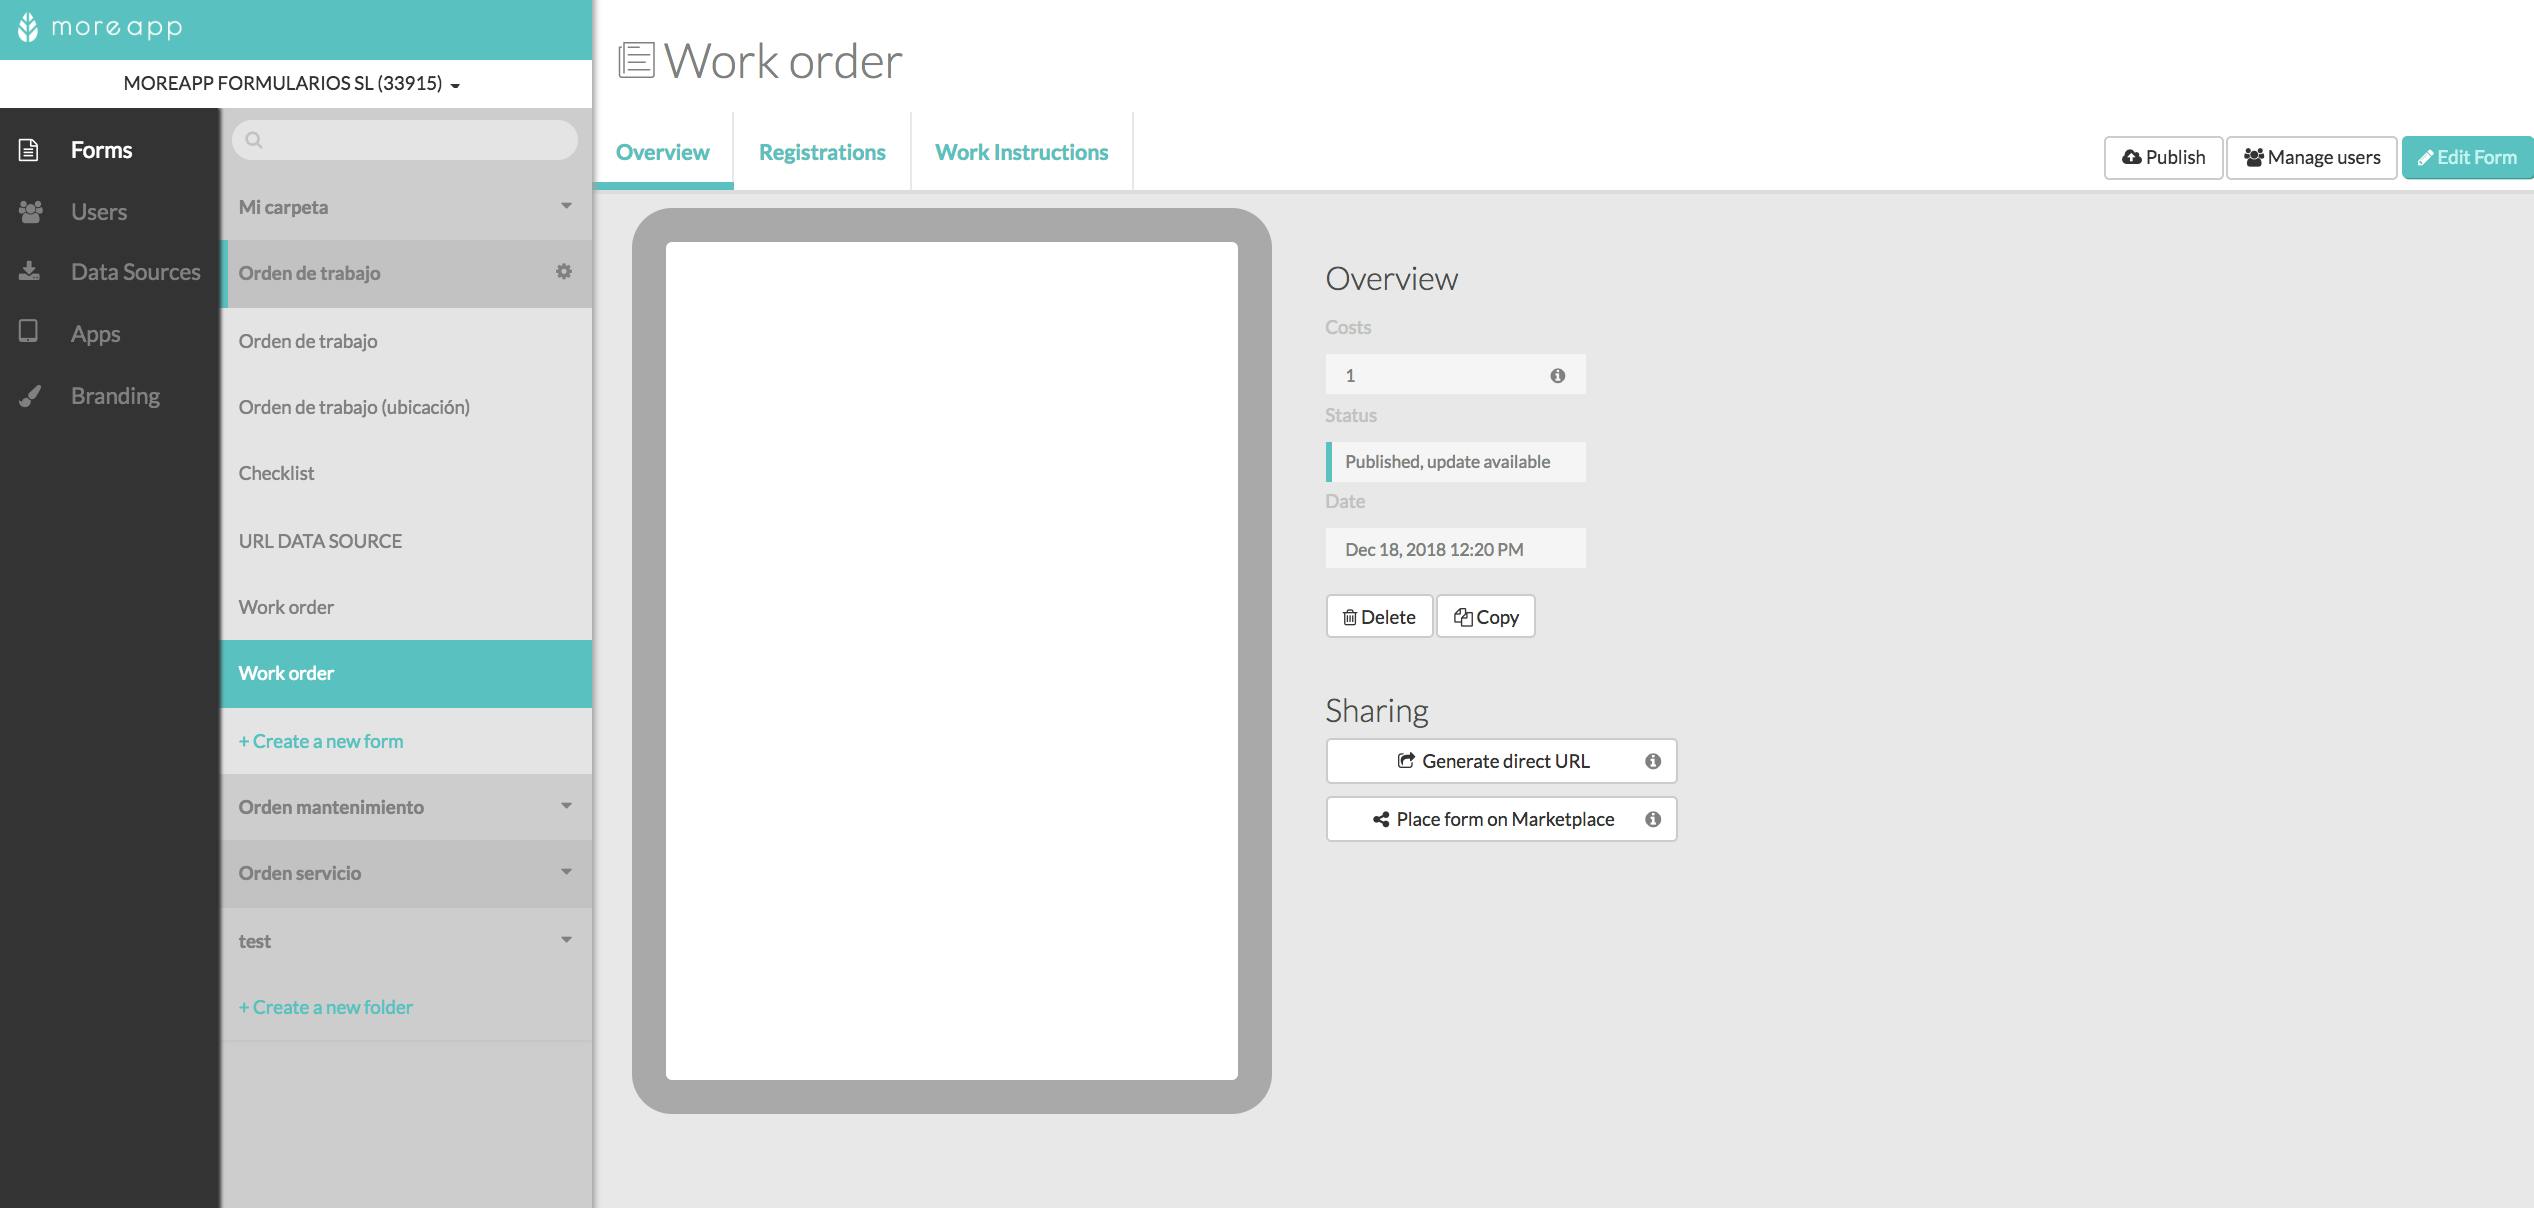
First, login to the MoreApp Platform and go to the Forms tab. + Create a new folder and + Create a new form. Then click on the Edit Form button to create your digital work order using different widgets.
2. Select Widgets
Now, you can build the form yourself, following the style of your company, using all the widgets you need. To add the widgets into the form, you just need to drag and drop them or double click on the widget.
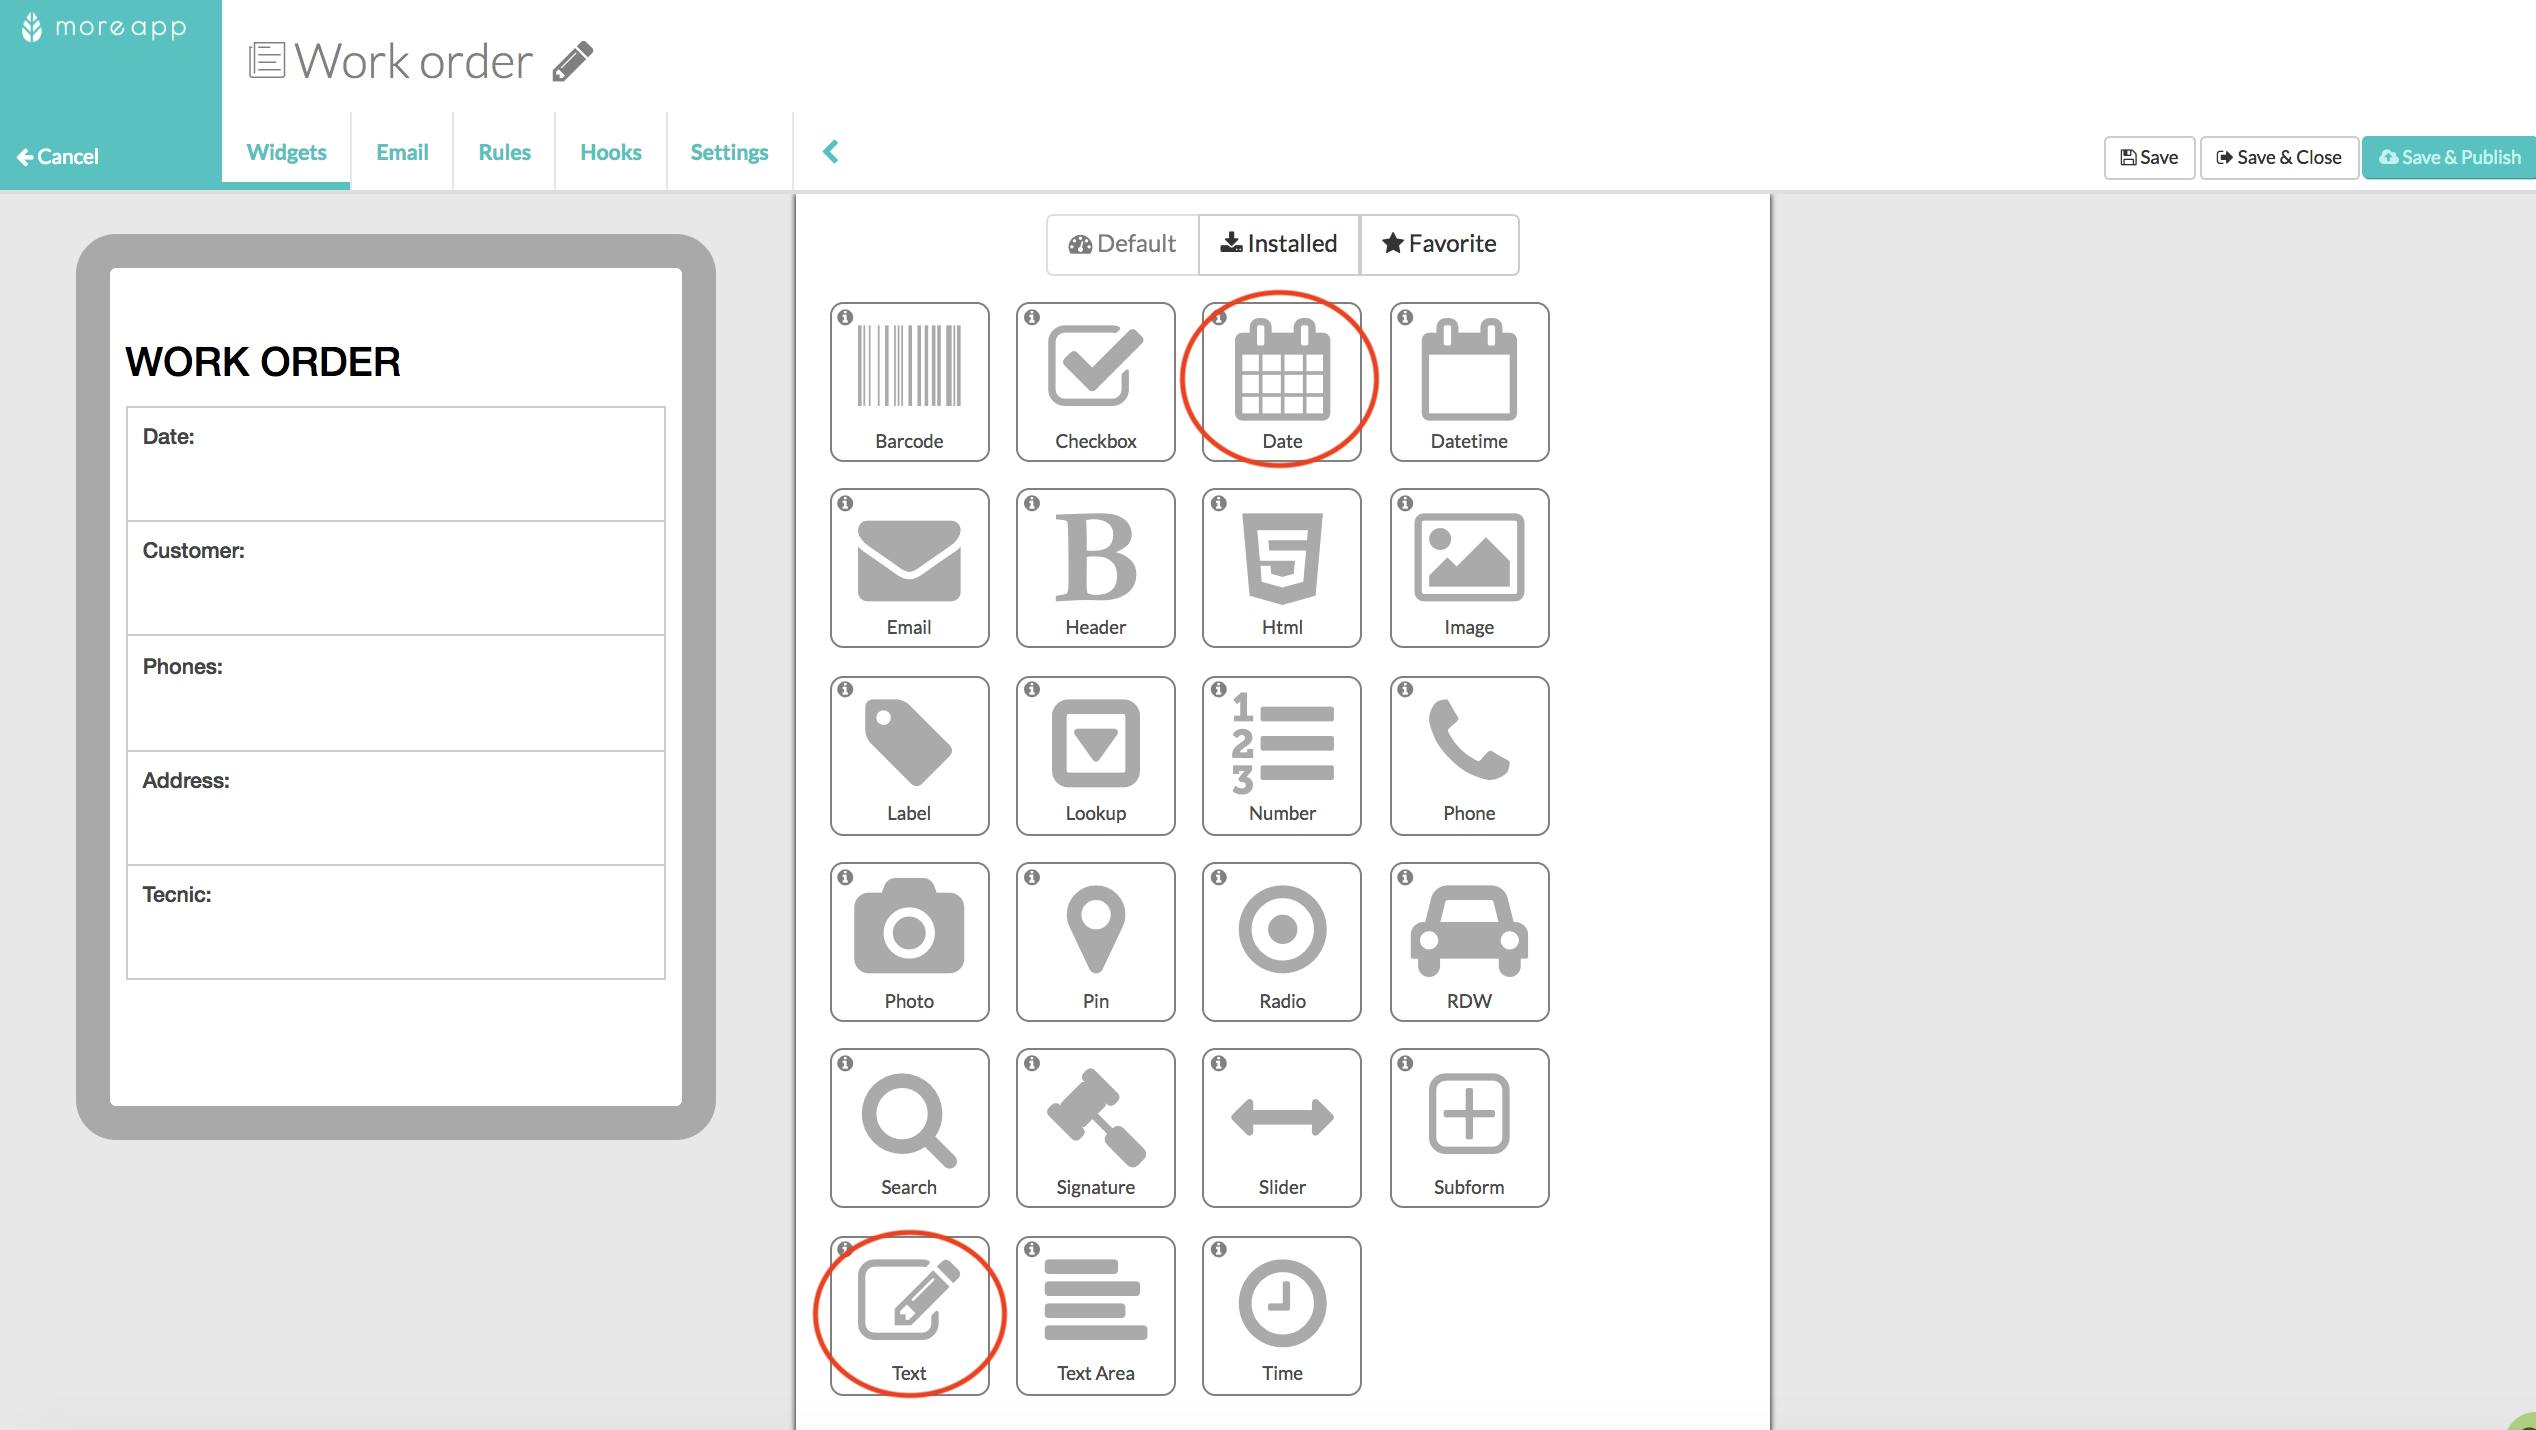
You can start by adding general data such as the data, name and company using Date- and Text-widgets:
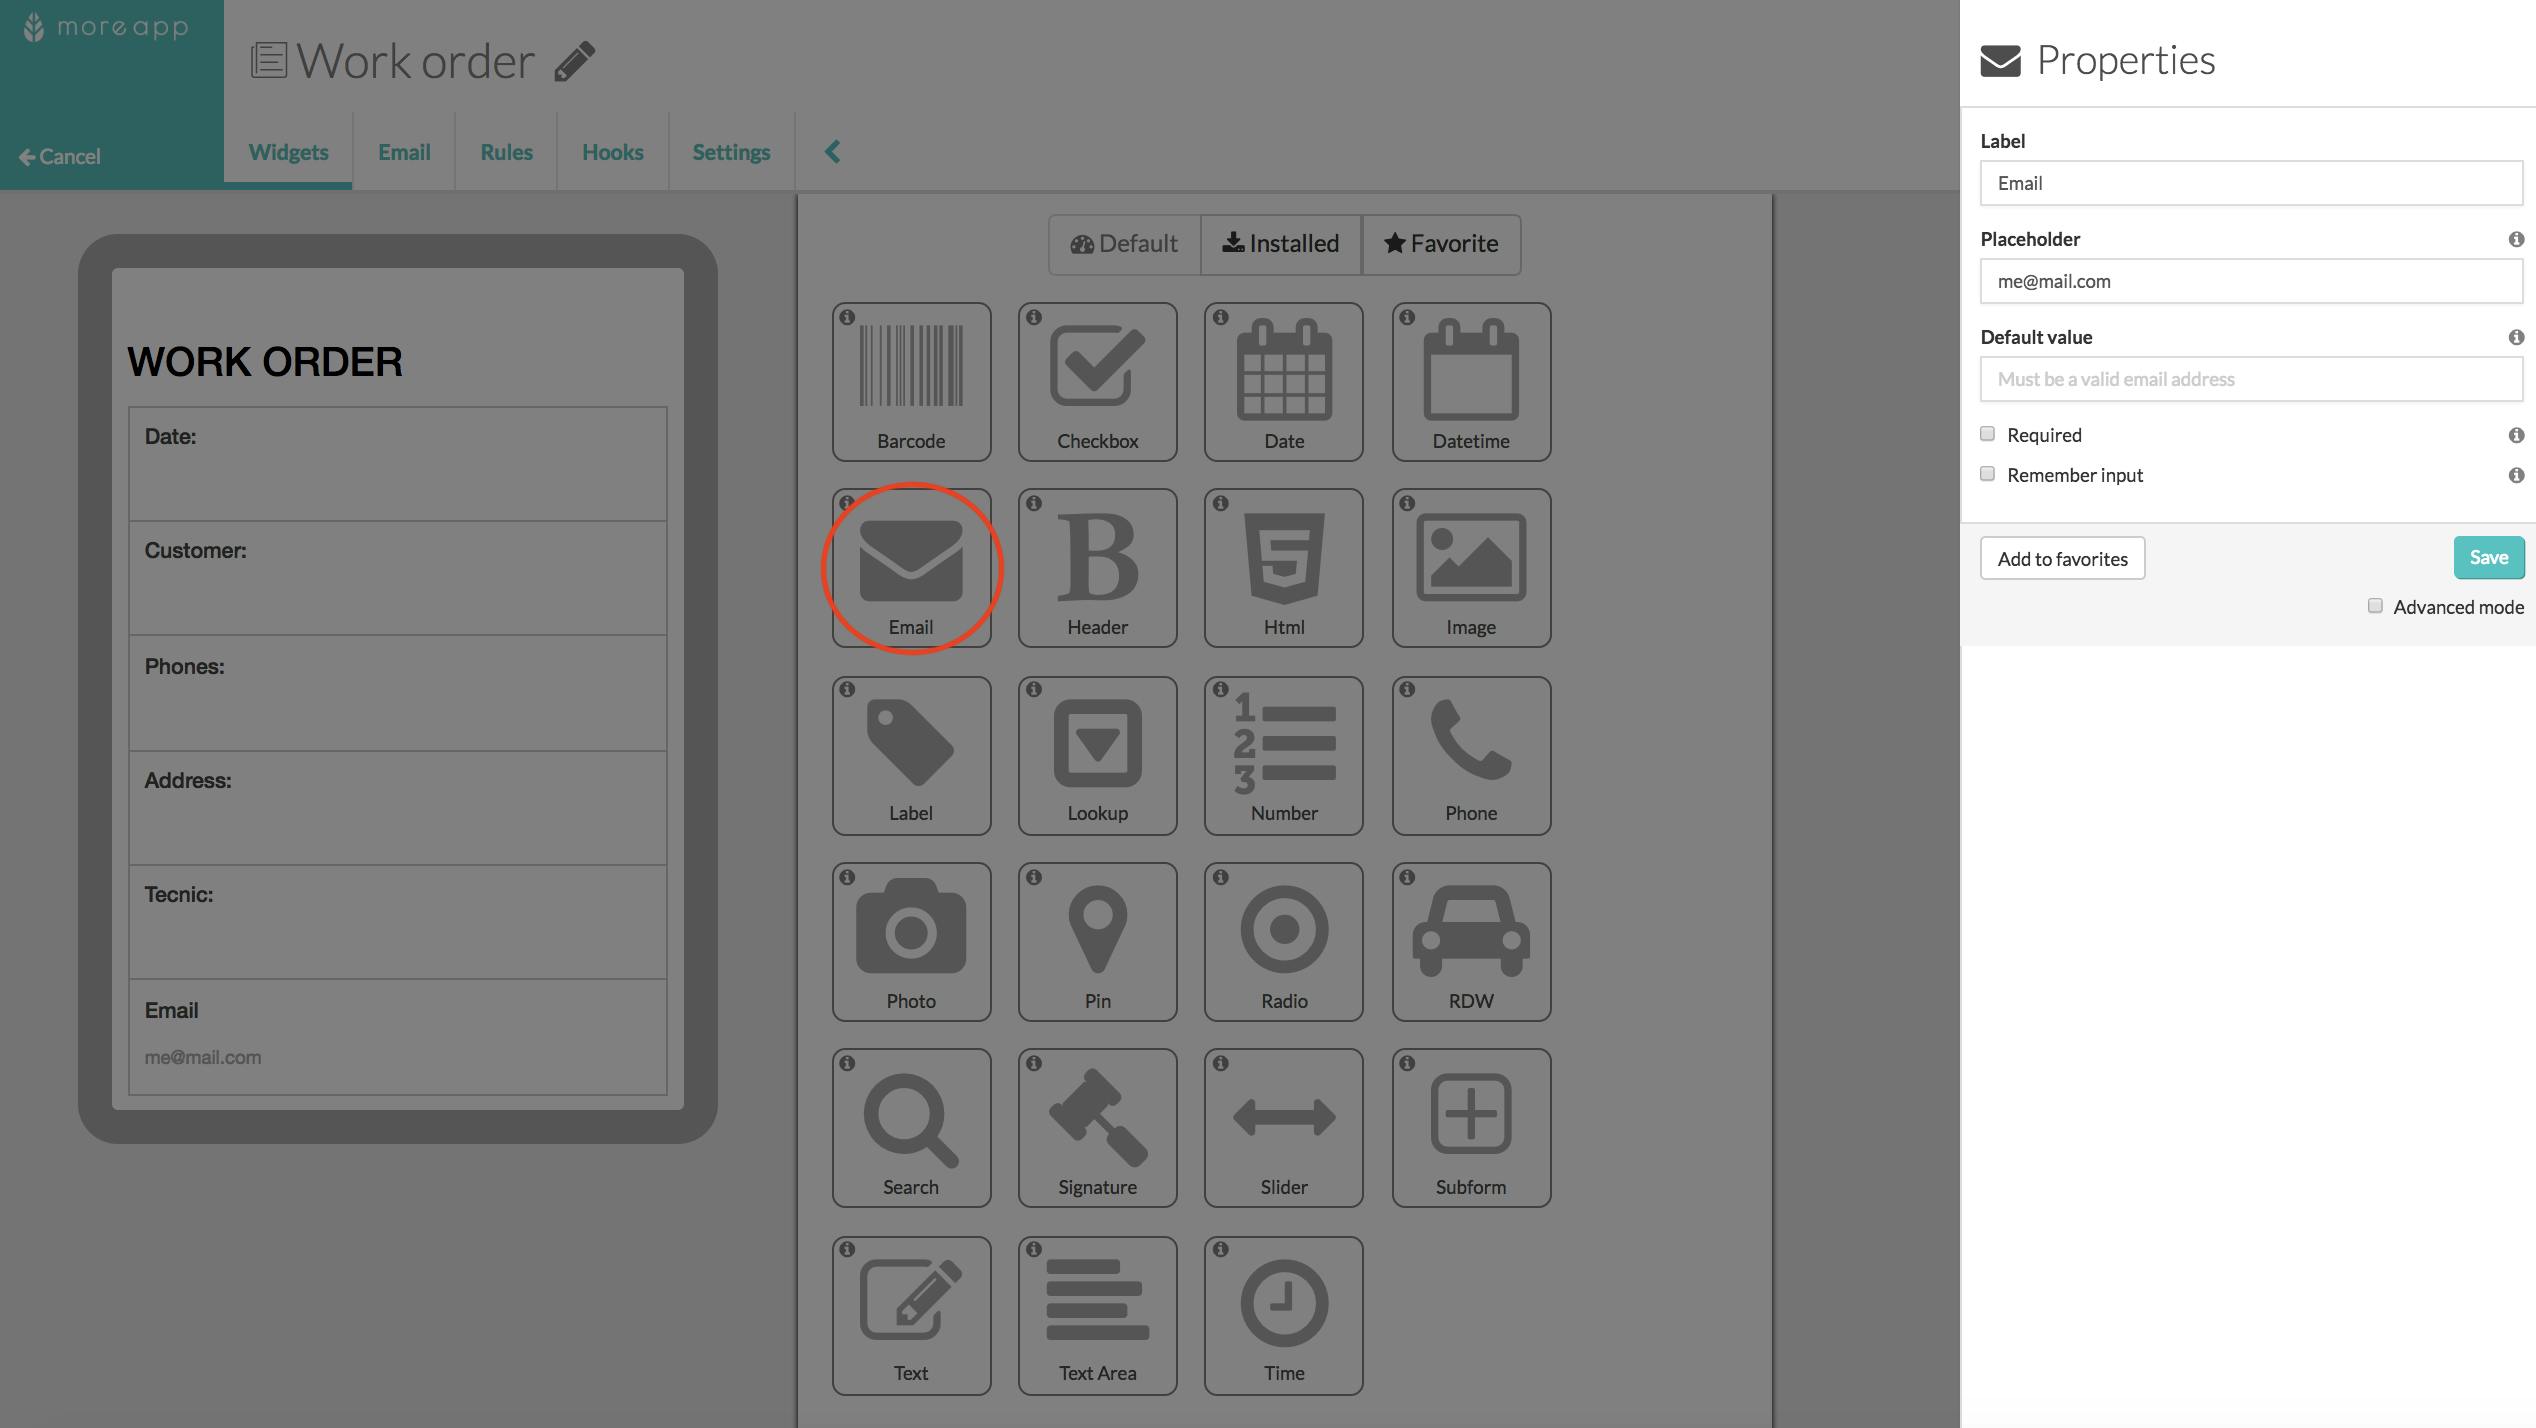
As additional information, you can ask for the email, using the Email-widget, which can be linked as a dynamic recipient to your email settings.
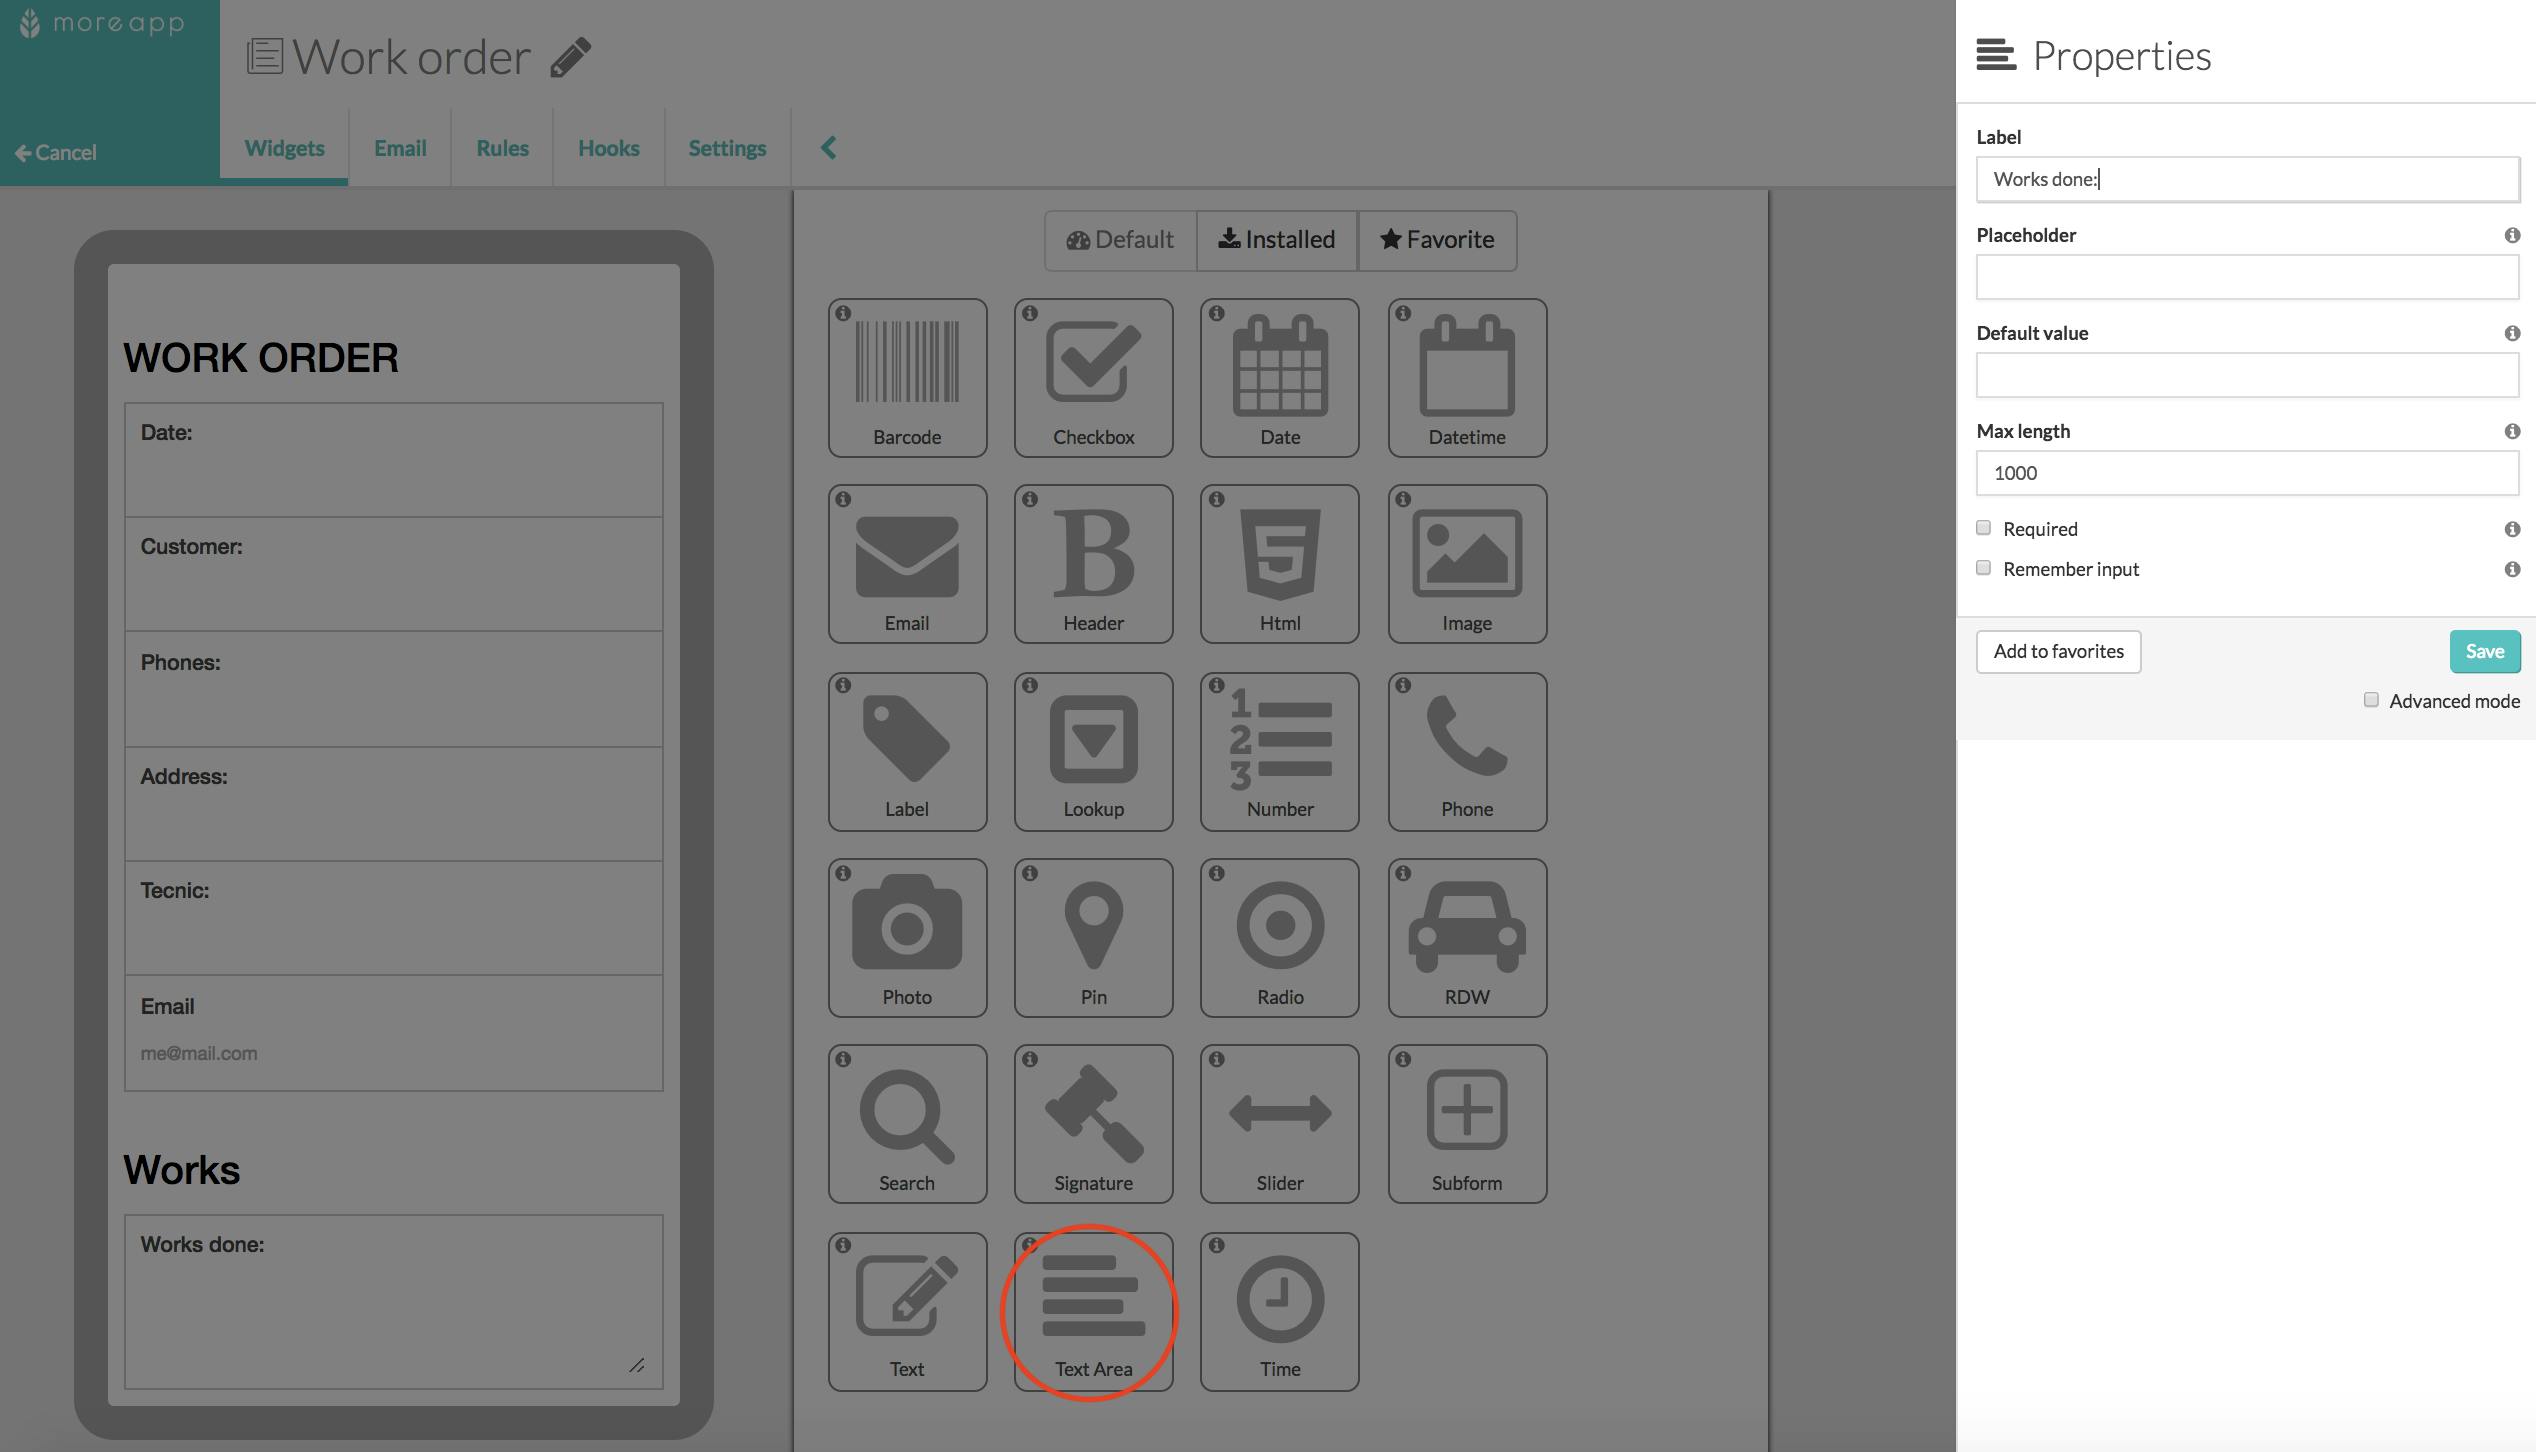
If you need to include longer or more detailed explanations, you can use the Text Area-widget, since it allows you to use more characters.
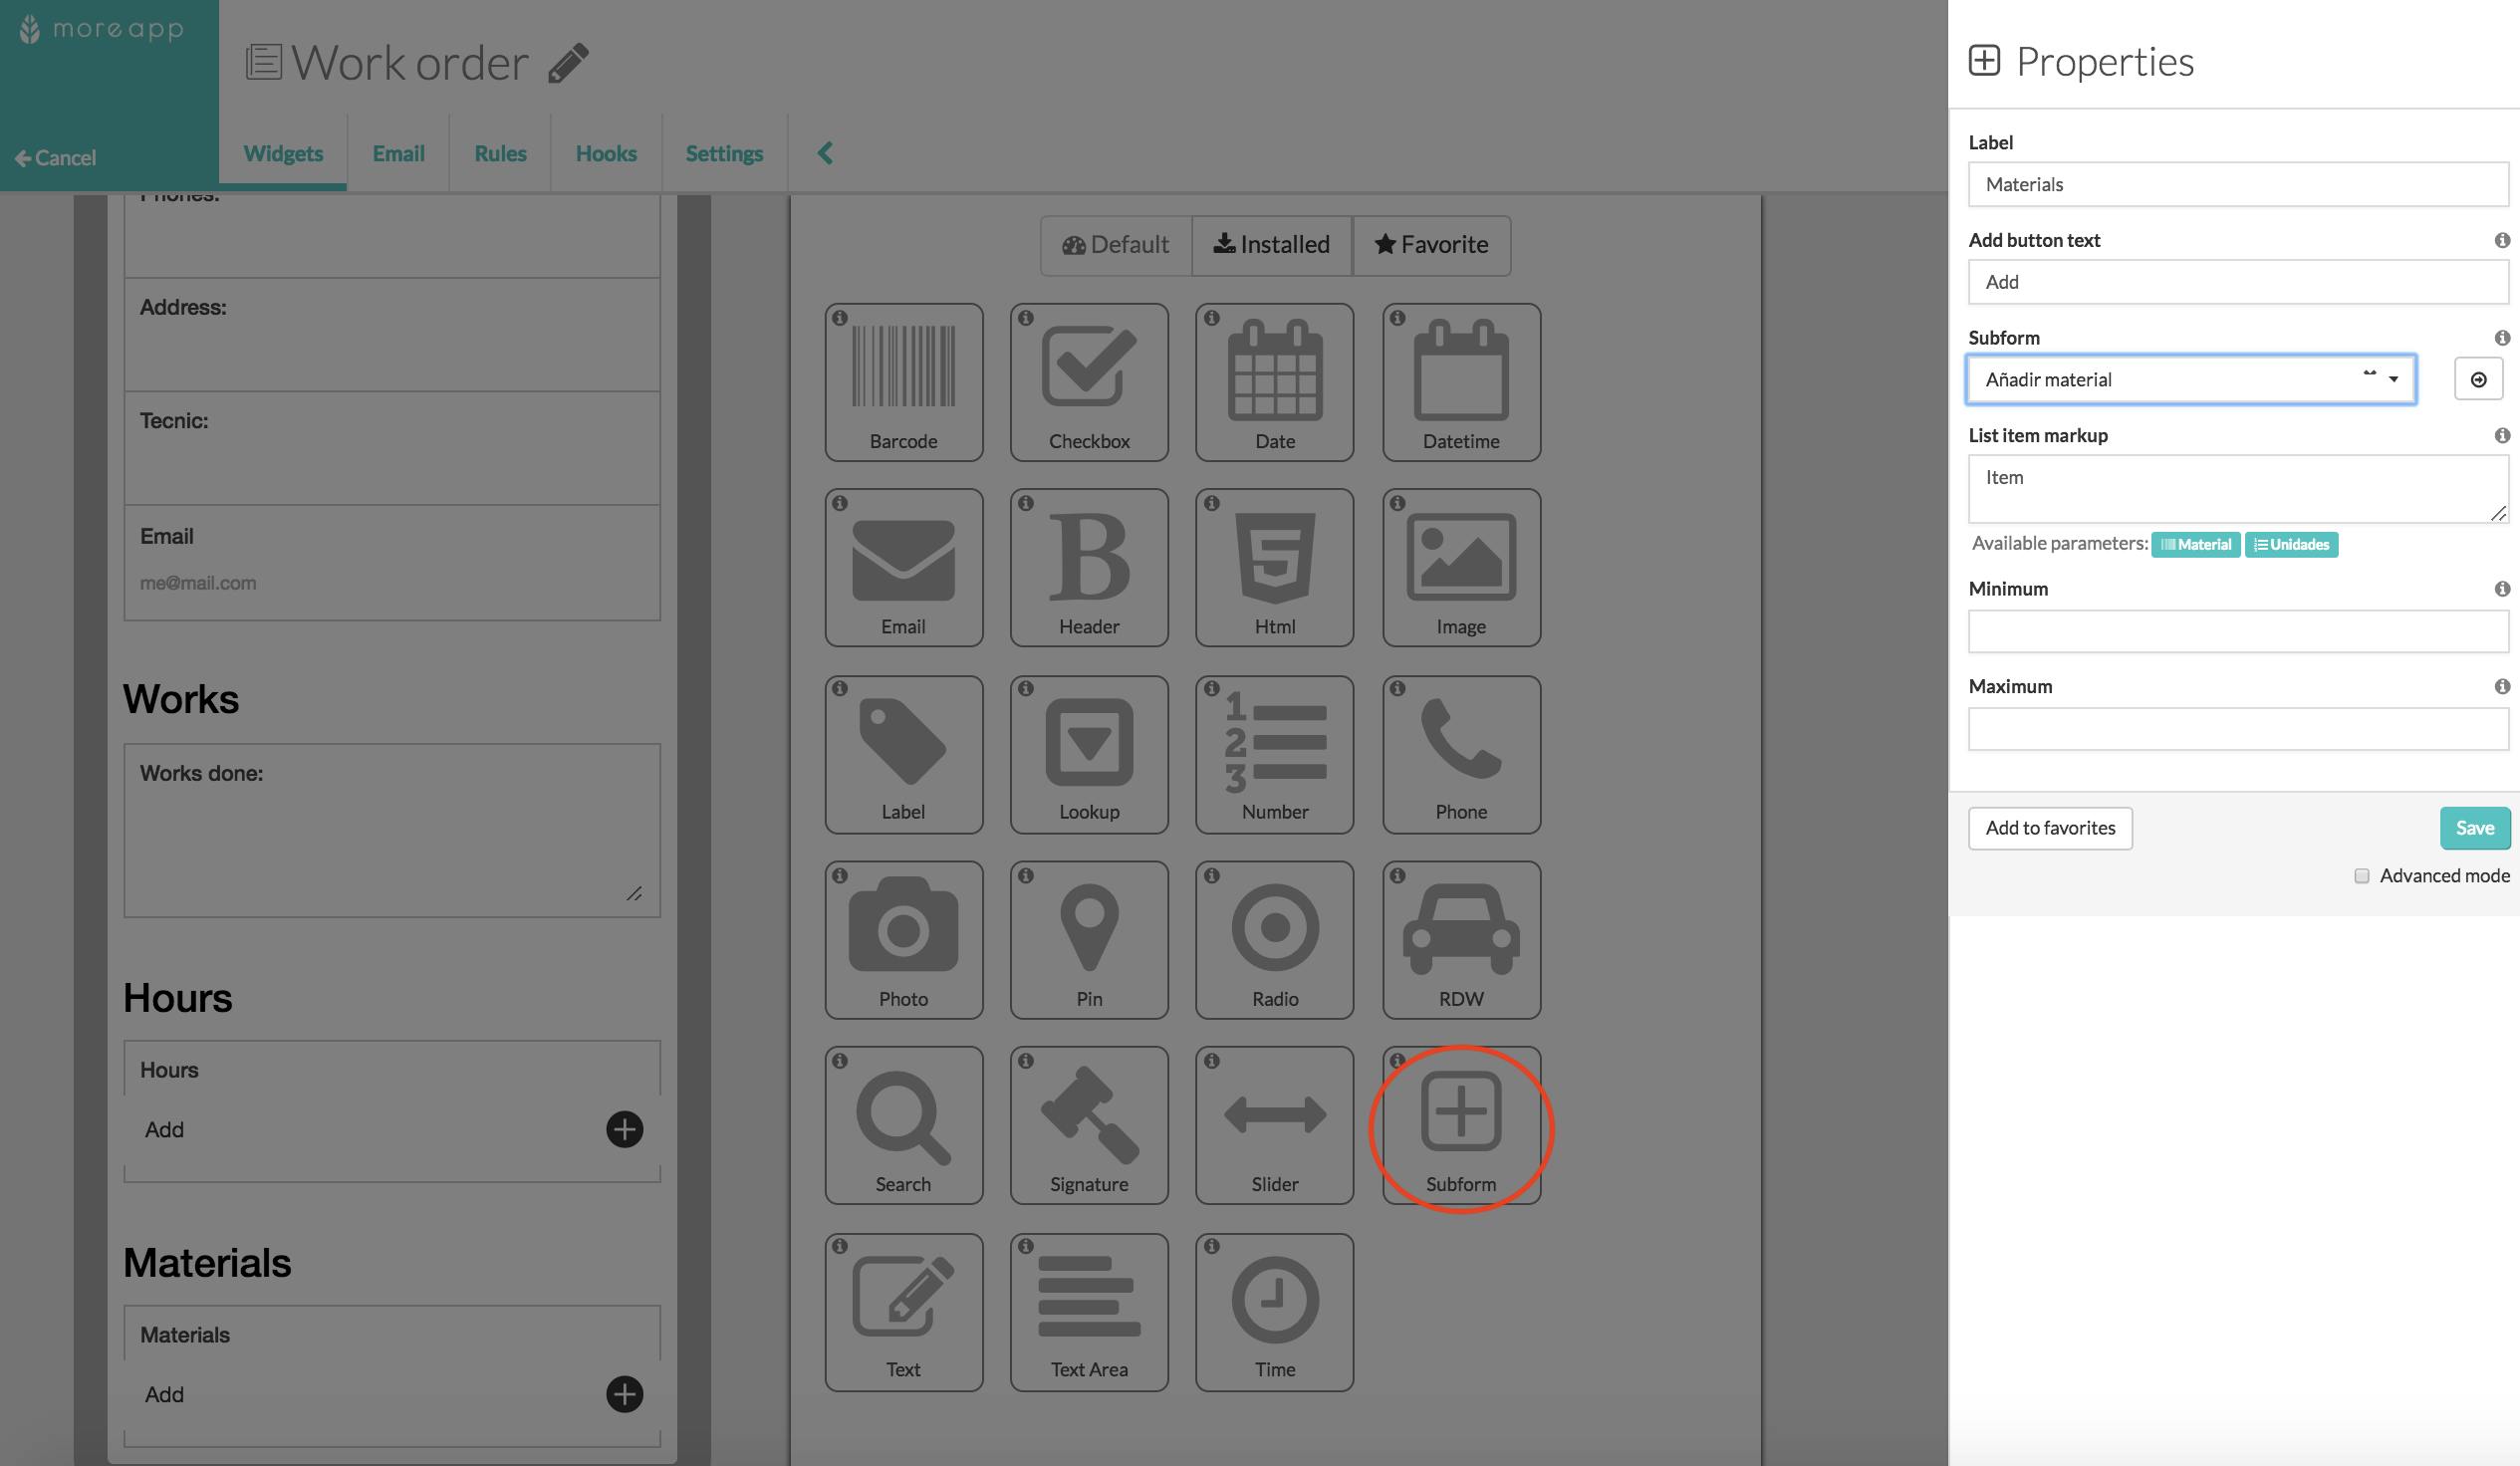
Use the Subform-widget when you need to fill in the same fields multiple times. For example, if you want to add all the materials used, working hours of multiple days or multiple photos.
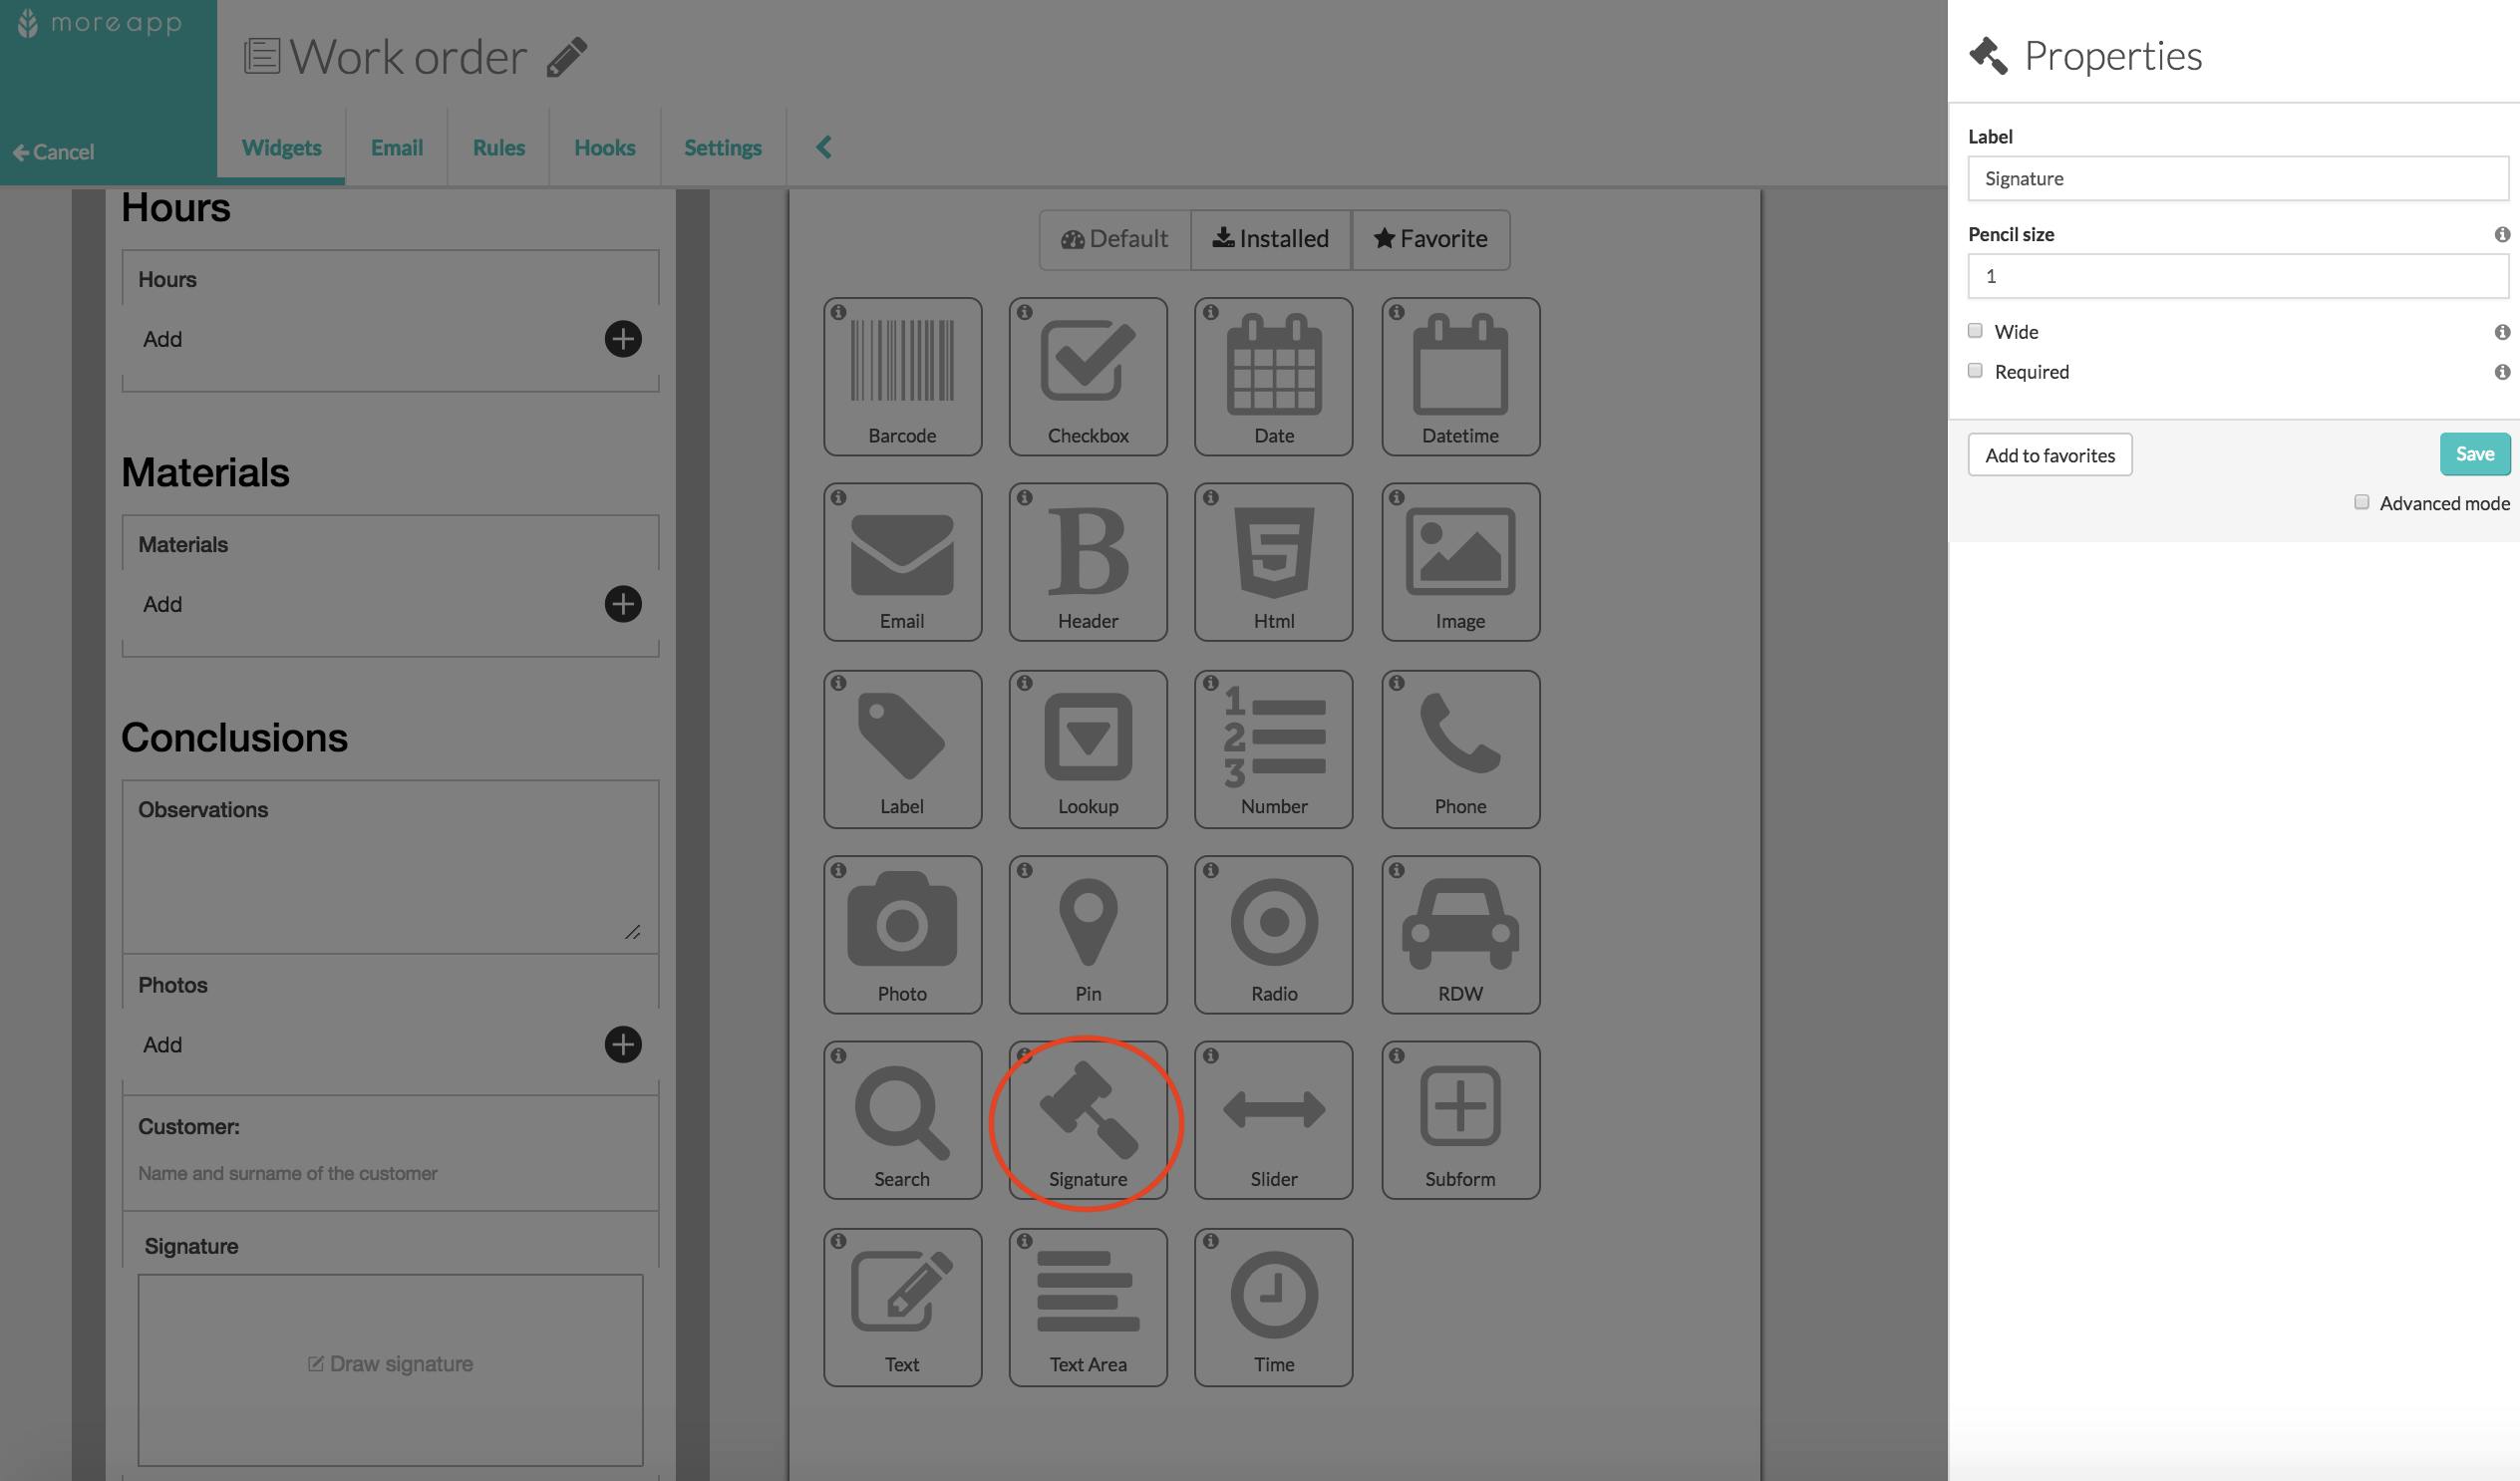
To end the form, you have the option to include the Signature-widget to formalise the document.
3. Congratulations!
You have now successfully created a digital work order!
For more tips and tricks, visit our Help Center.


